Link a Local Repository to GitHub
Version control really comes into its own when we begin to collaborate with other people. We already have most of the machinery we need to do this; the only thing missing is to copy changes from one repository to another.
Systems like Git allow us to move work between any two repositories. In practice, though, it’s easiest to use one copy as a central hub, and to keep it on the web rather than on someone’s laptop. Most programmers use hosting services like GitHub, BitBucket or GitLab to hold those master copies.
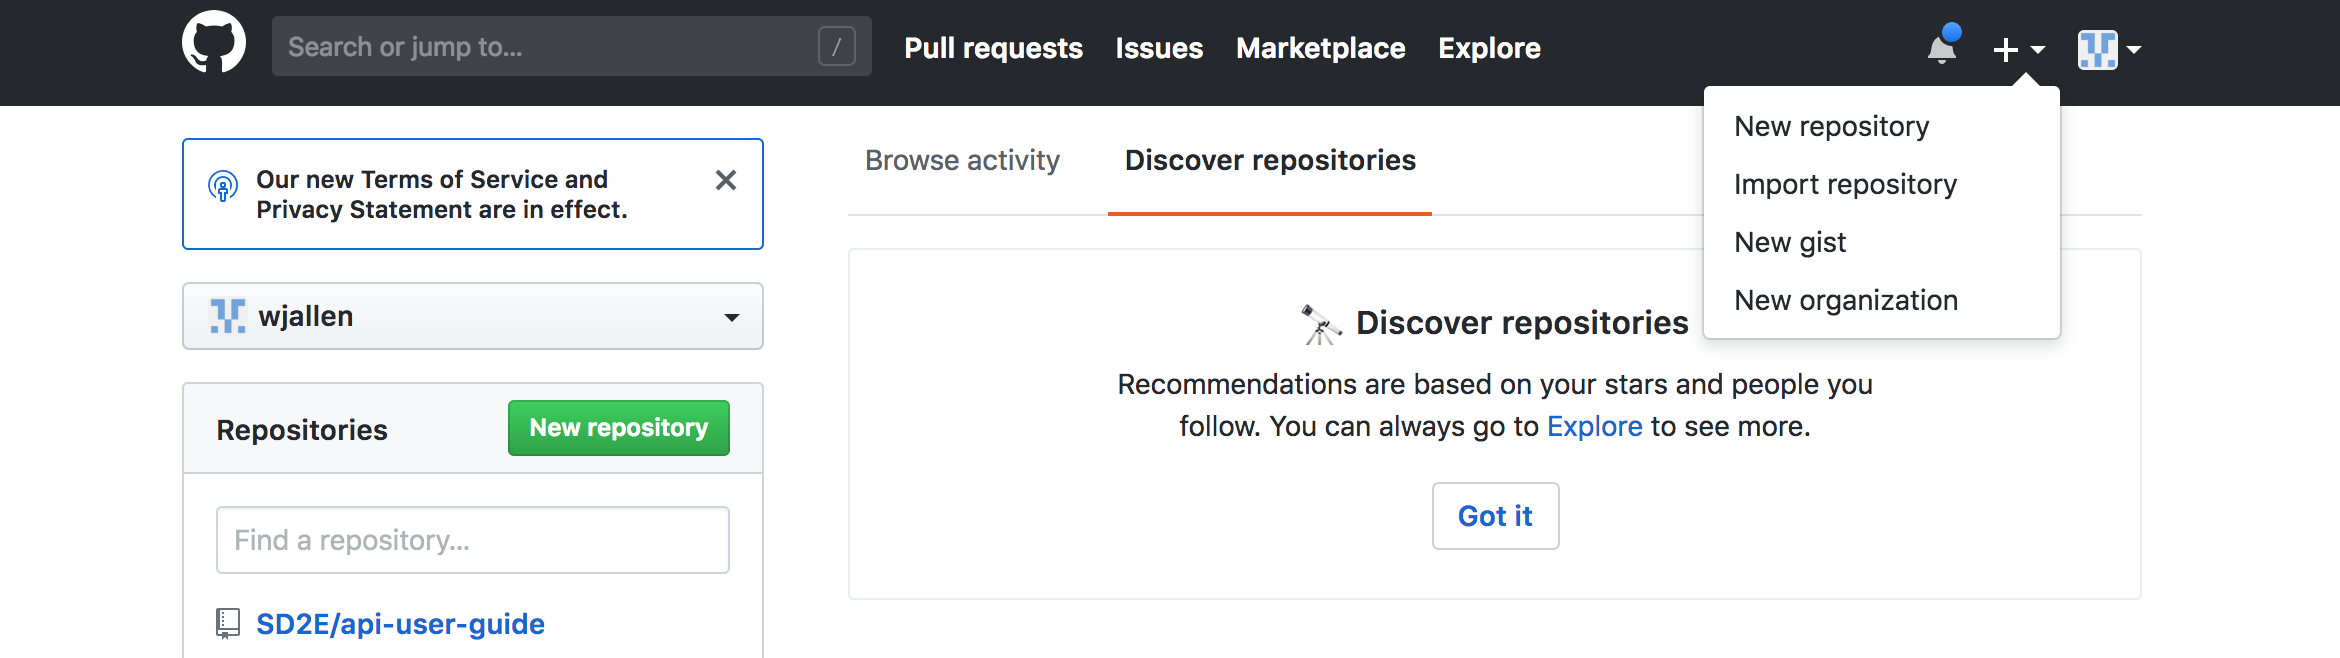
Let’s start by sharing the changes we’ve made to our current project with the
world. Log in to GitHub, then click on the icon in the top right corner to
create a new repository called my_first_repo:
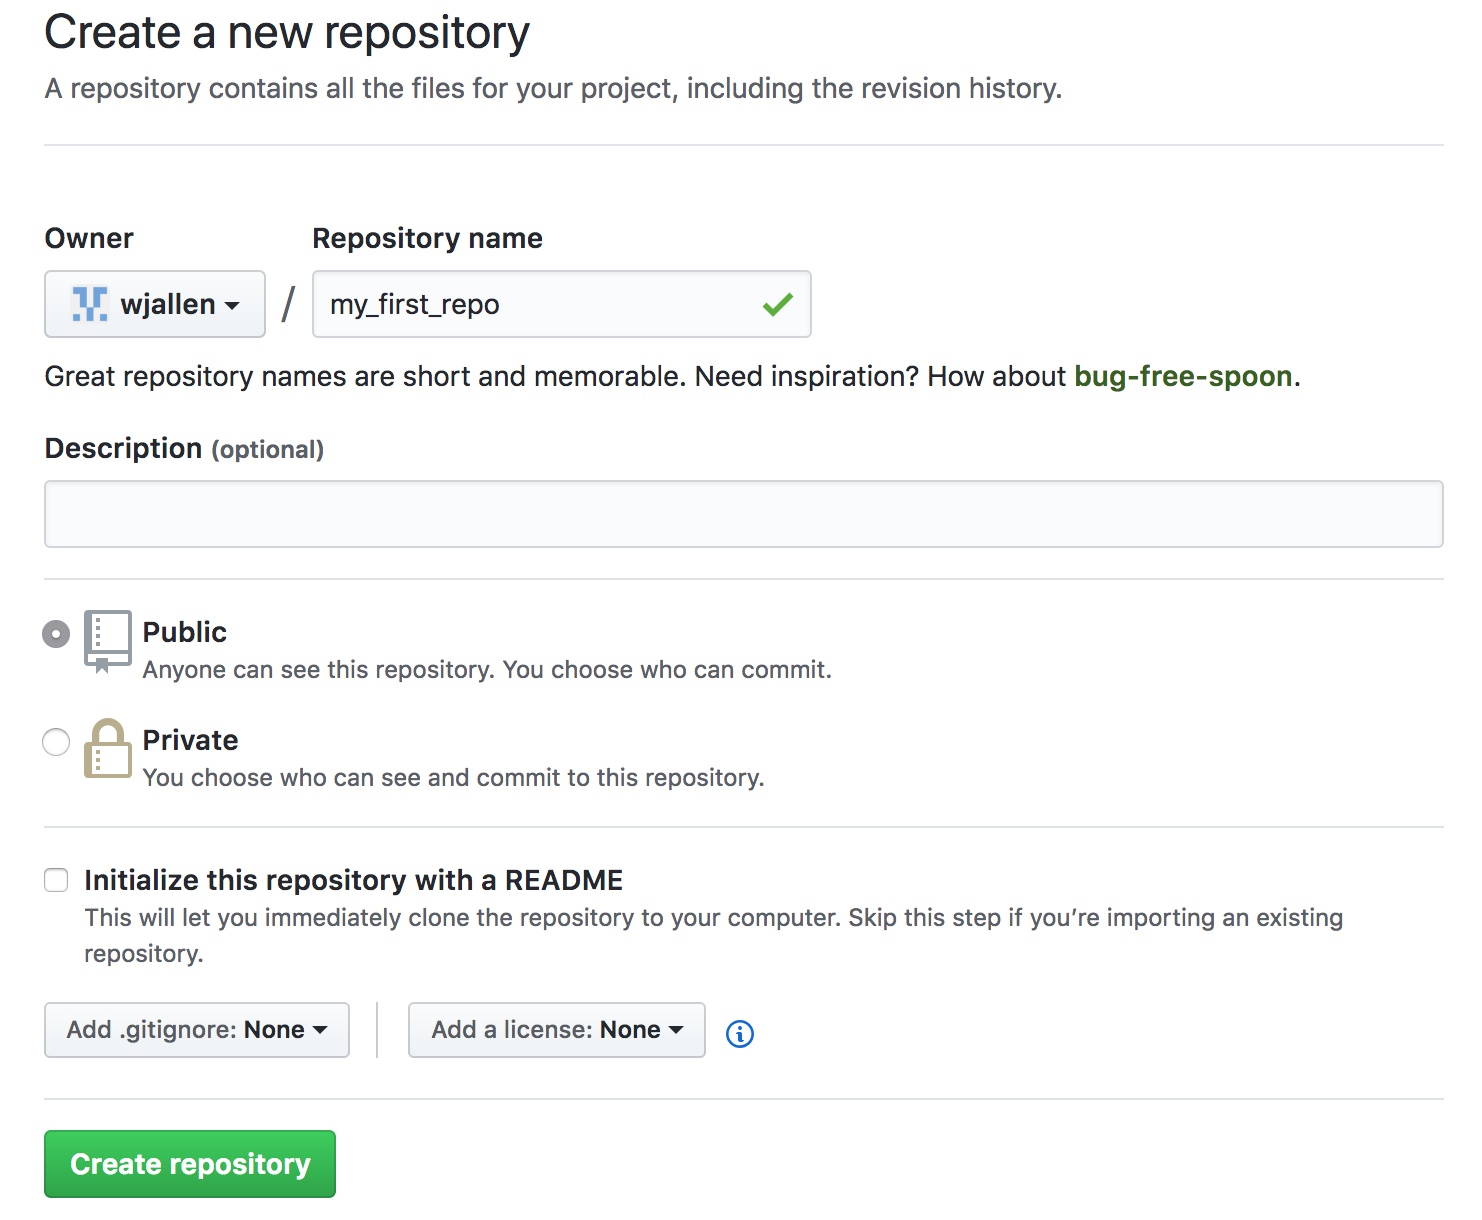
Name your repository “my_first_repo” and then click “Create Repository”:
As soon as the repository is created, GitHub displays a page with a URL and some information on how to configure your local repository:
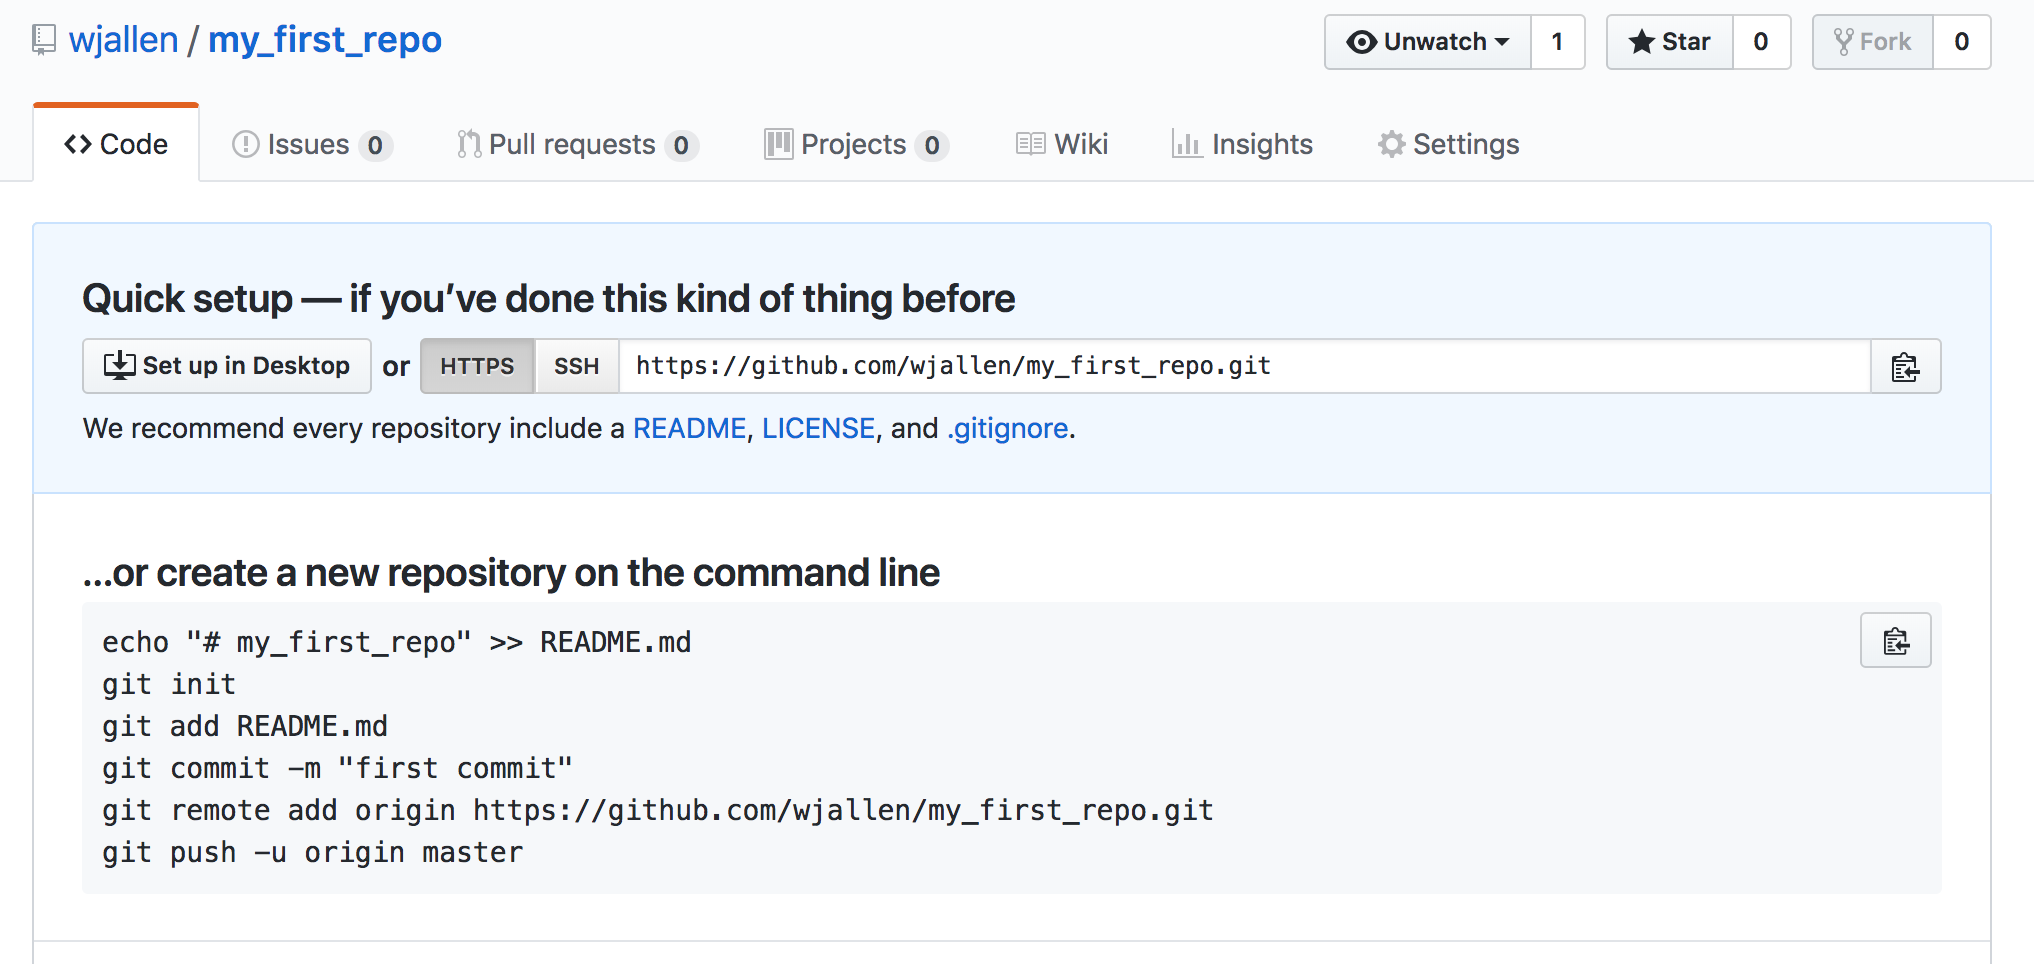
This effectively does the following on GitHub’s servers:
$ mkdir my_first_repo
$ cd my_first_repo
$ git init
If you remember back to the earlier lesson where we added and
committed our earlier work on transcriptome.txt, we had a diagram of the local repository
which looked like this:

Now we have two repositories: the local repository resembles the diagram above, and the repository of the same name hosted on the GitHub servers is completely empty.
Note that our local repository still contains our earlier work on transcriptome.txt, but the
remote repository on GitHub doesn’t contain any memory of transcriptome.txt yet.
The next step is to connect the two repositories. We do this by making the GitHub repository a “remote” for the local repository. The home page of the repository on GitHub includes the string we need to identify it:

Copy that URL from the browser, go into the local my_first_repo repository, and run
this command:
$ git remote add origin https://github.com/wjallen/my_first_repo.git
Make sure to use the URL for your repository rather than mine: the only
difference should be your username instead of wjallen.
We can check that the command has worked by running git remote -v:
$ git remote -v
origin	https://github.com/wjallen/my_first_repo.git (fetch)
origin	https://github.com/wjallen/my_first_repo.git (push)
The name origin is a local nickname for your remote repository. We could use
something else if we wanted to, but origin is by far the most common choice.
Once the nickname origin is set up, this command will push the changes from
our local repository to the repository on GitHub:
$ git push origin master
Username for 'https://github.com': wjallen
Password for 'https://wjallen@github.com':
Counting objects: 12, done.
Delta compression using up to 28 threads.
Compressing objects: 100% (7/7), done.
Writing objects: 100% (12/12), 1.13 KiB | 0 bytes/s, done.
Total 12 (delta 2), reused 0 (delta 0)
remote: Resolving deltas: 100% (2/2), done.
To https://github.com/wjallen/my_first_repo.git
 * [new branch]      master -> master
Proxy
If the network you are connected to uses a proxy, there is a chance that your last command failed with “Could not resolve hostname” as the error message. To solve this issue, you need to tell Git about the proxy:
$ git config --global http.proxy http://user:password@proxy.url
$ git config --global https.proxy http://user:password@proxy.url
When you connect to another network that doesn’t use a proxy, you will need to tell Git to disable the proxy using:
$ git config --global --unset http.proxy
$ git config --global --unset https.proxy
Clone the Repository
Spend a few minutes browsing the web interface for GitHub. Now, anyone can make a full copy of my_first_repo including all the commit history by performing:
$ git clone https://github.com/wjallen/my_first_repo
Cloning into 'my_first_repo'...
remote: Counting objects: 12, done.
remote: Compressing objects: 100% (5/5), done.
remote: Total 12 (delta 2), reused 12 (delta 2), pack-reused 0
Unpacking objects: 100% (12/12), done.
Checking connectivity... done.
| Previous: Exploring History | Next: Collaborating with Others | Top: Course Overview |